Tips, tricks, and devices to super-charge your pre- or post-ride coffee regime.

Brew like a barista and make your own home coffee stop. If you thought you needed to splurge on shiny, show-offy kit to make barista-style coffee, we'll help you get better, fuller flavour coffee with help from our expert panel covering everything from Aeropress to stovetop, pour over to the simple cafetiere.
The first tip, which every expert from BEAR, Volcano, and Workshop Coffee was keen to point out is that everyone is lazy. No one weighs their beans or measures their water. Taking the extra sixty-seconds to do that will get you better results at home.
Tip two: you don't need a grinder, but it helps give a better flavour. Most people have a garlic press or a pepper grinder, but not a coffee grinder. You can get a hand coffee grinder for as little as £5.99, and grinding coffee for a pot takes no more than a minute or two.
Our experts
For a bit of background on our experts, Volcano Coffee are staunch supporters of grassroots cycling venue, Herne Hill Velodrome, they also created compostable coffee pods for home Nespresso machines.
Workshop Coffee, also based in London, have been long time sponsors of cycling team 5th Floor and other London-based cycle races.
BEAR, based in Leicester, supported both of our summer cycling festivals, providing free coffee before and after the sportive ride.
You can pick up kit for brewing, beans, and more from their online stores. All are still shipping and roasting, and would love your support whilst their cafes and wholesale customers are closed.
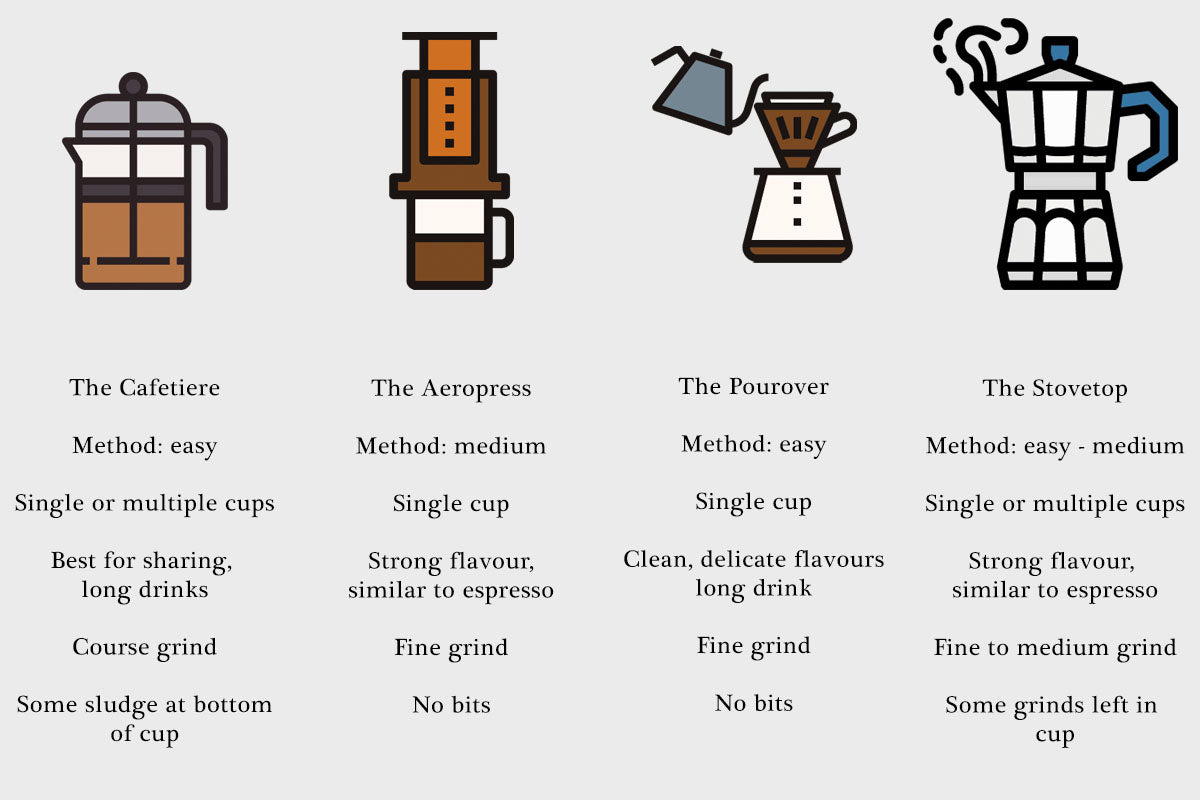
The secret to a good cafetiere coffee
You'll need:
60g course ground coffee
1 litre of boiling water
Cafetiere
Spoon
Known also as French Press or Plunger coffee.
Step 1
Pre-heat your kit. Pour boiling water into your cafetiere and the plunger, and leave for a minute. This will ensure heat isn't lost and the coffee brews properly.
Step 2
Decant your hot water. Pour it into your cup to warm it through. Fill the cafetiere with ground coffee. A medium grind is ideal.
|
 |
Step 3
Wait four minutes.
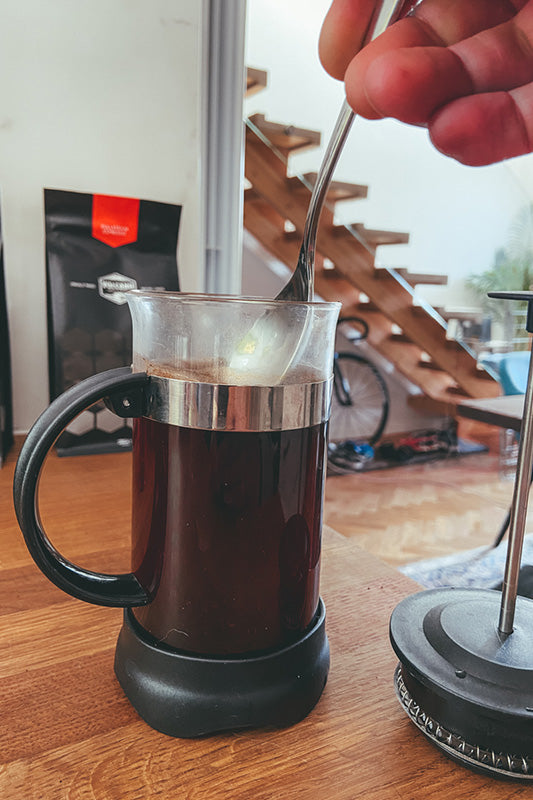
Step 4
Using the back of a spoon, break the crust that forms on the top of the coffee. Remove the foam from the surface.
Why? Pat from Allpress Coffee says: "the foam contains fine coffee grinds, which end up as sludge in your cup, creating a bitter flavour."
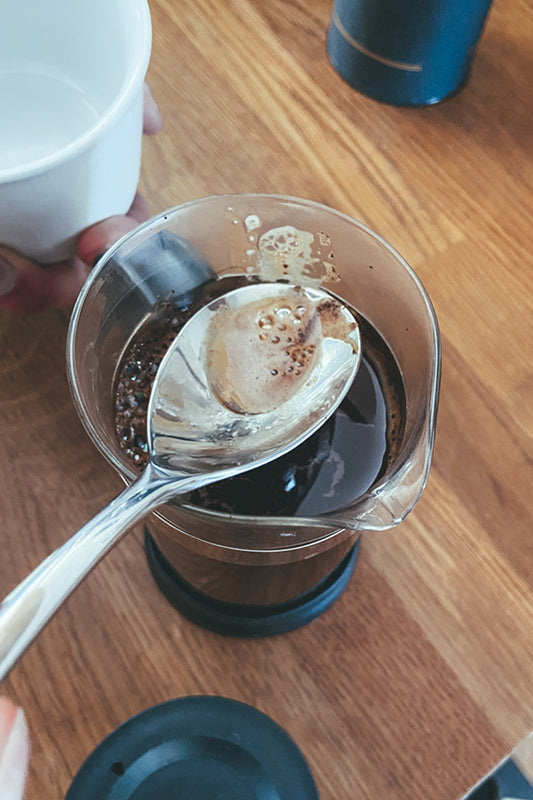
Step 5
Push the plunger down. Leave a space of two inches from the bottom.
Why? Head roaster, Kurt Stewart, of Brixton-based Volcano Coffee explains: "you want to keep the ground coffee in the plunger and not muddled into the brew."
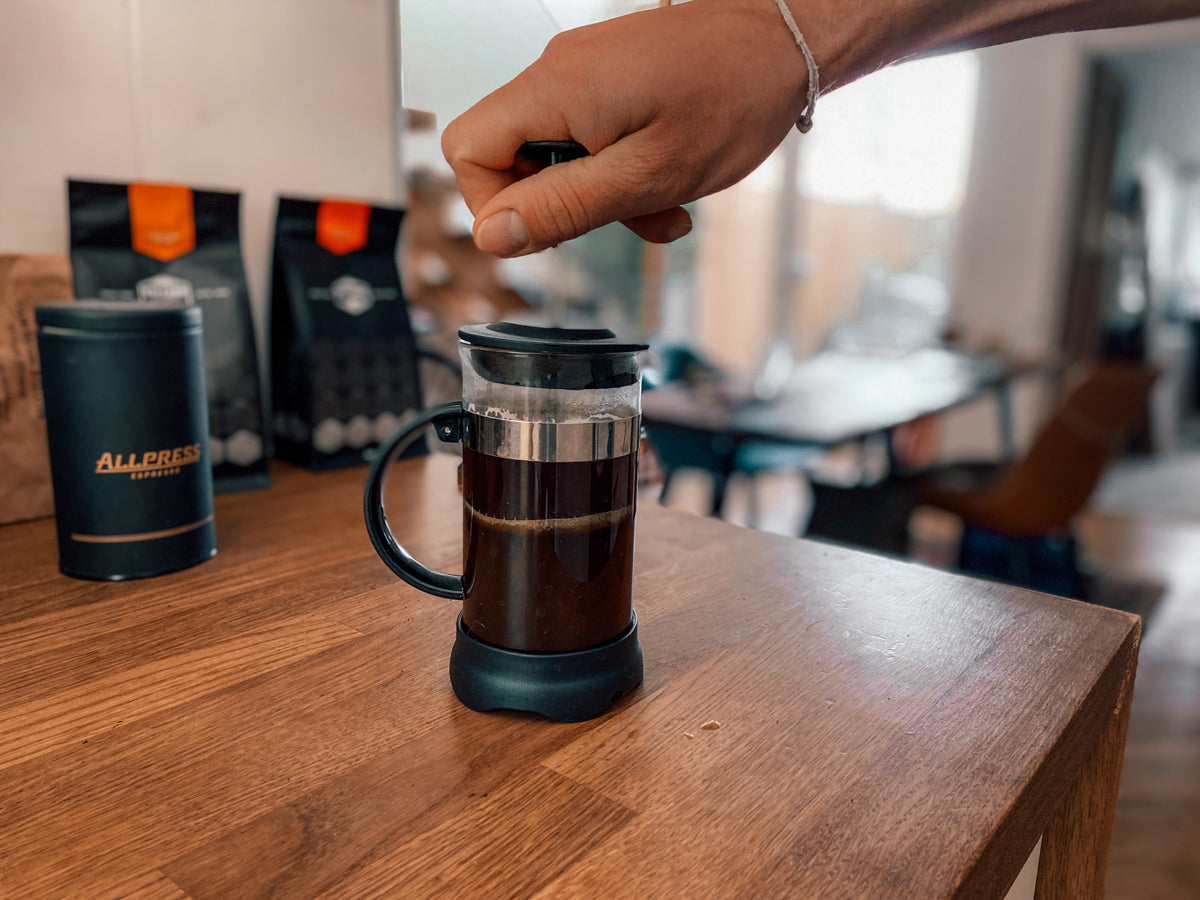
Step 6
Pour and drink.
Tip: "If you leave the grounds to sit for too long in the beaker, you will taste some unpleasant, bitter flavours in your cup", says Kurt from Volcano. "I recommend that you serve the entire brewed coffee from the cafetiere at the same time."
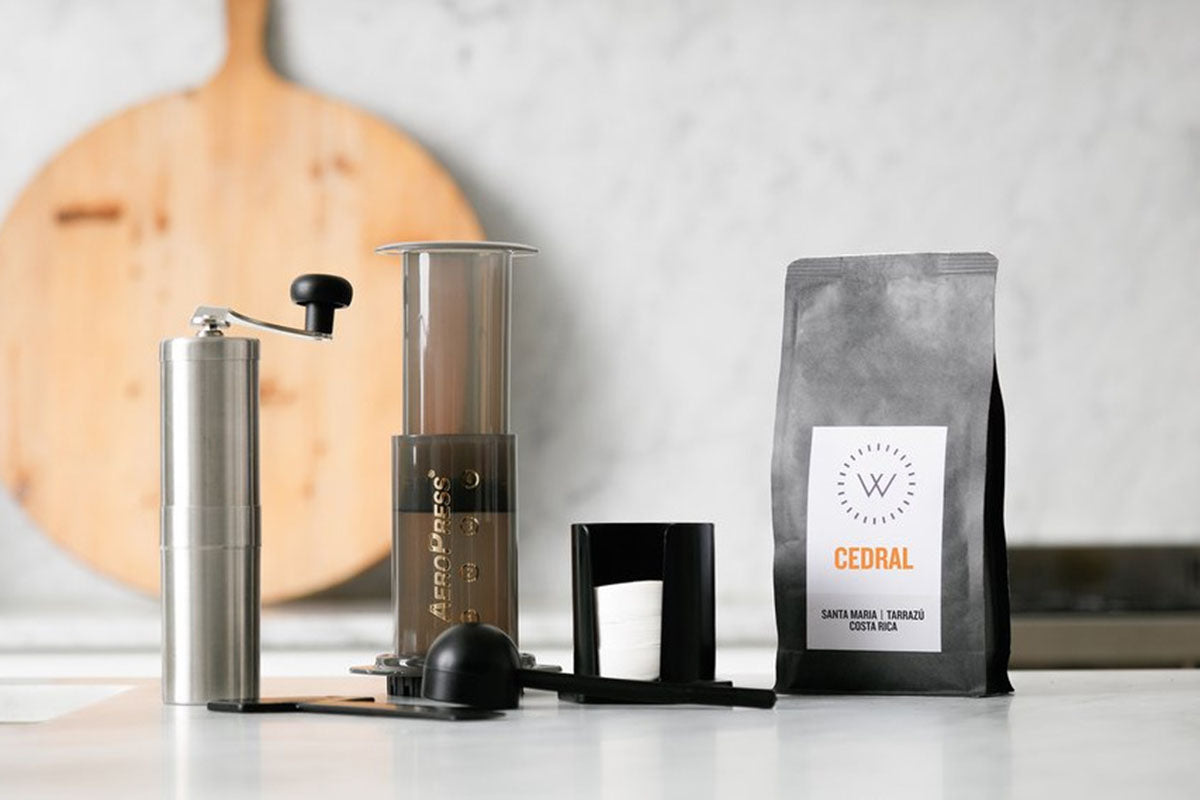
The Aeropress
You'll need:
20g of fine ground coffee
250ml of boiling water
Aeropress
Spoon
Invented by American, Alan Adler, also known for inventing the aerobic frisbee, his Aeropress is a lightweight gadget, costing around £25. Unlike a cafetiere, the coffee is extracted using pressure, and the coffee contains no grit or bits of grind.
You can buy an Aeropress from Workshop Coffee, here.
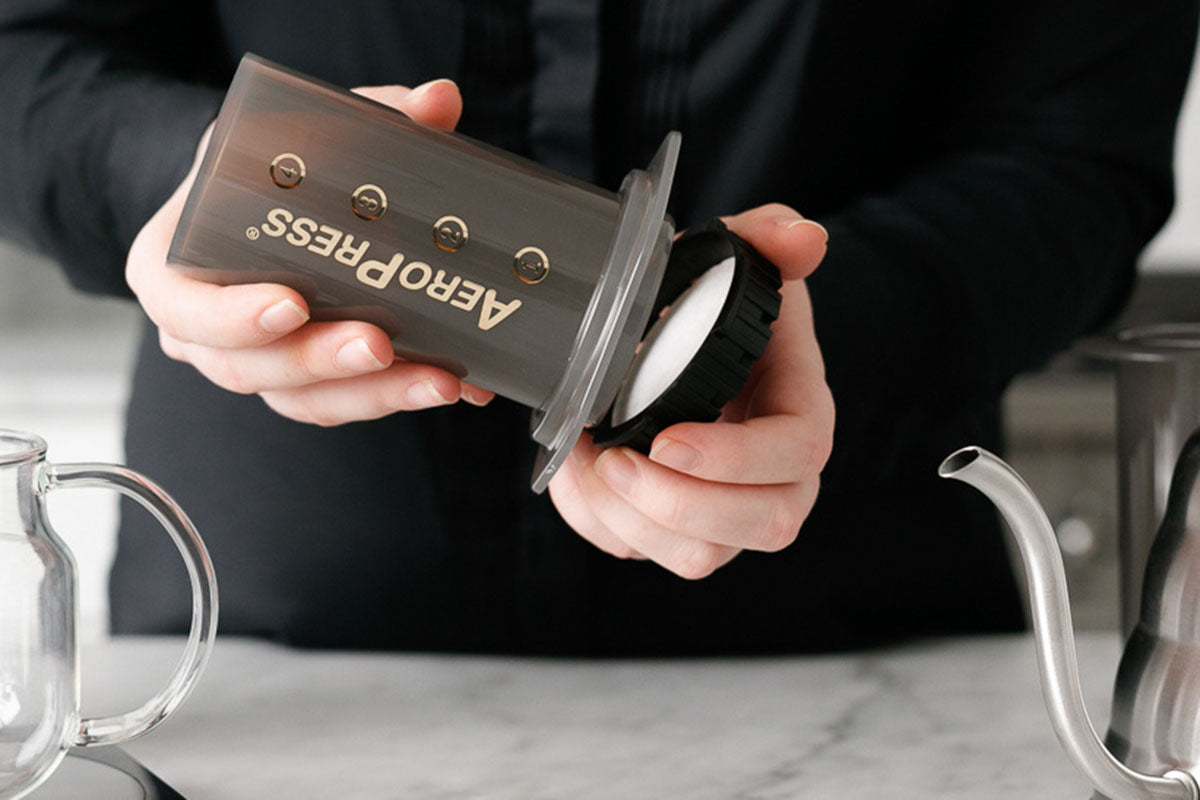
Step 1
Assemble your Aeropress. Put a filter in the bottom chamber.
Tip: James Bailey of Workshop Coffee recommends using two or three paper filters "if you like thin, clear, open flavours. If you prefer a thicker, oily coffee, use a metal filter."
Step 2
Using the scoop provided with the press, add your finely ground coffee. Use 17-20g of coffee for 250ml of water.
Step 3
Check you've fitted the rubber seal to the bottom of your plunger.
Tip: "A lot of people forget to put it on [to create a vacuum] and the coffee drains through the filter quickly before you plunge it", says Bailey. "So pop the plunger in to let it steep; that's the first step to improving it."
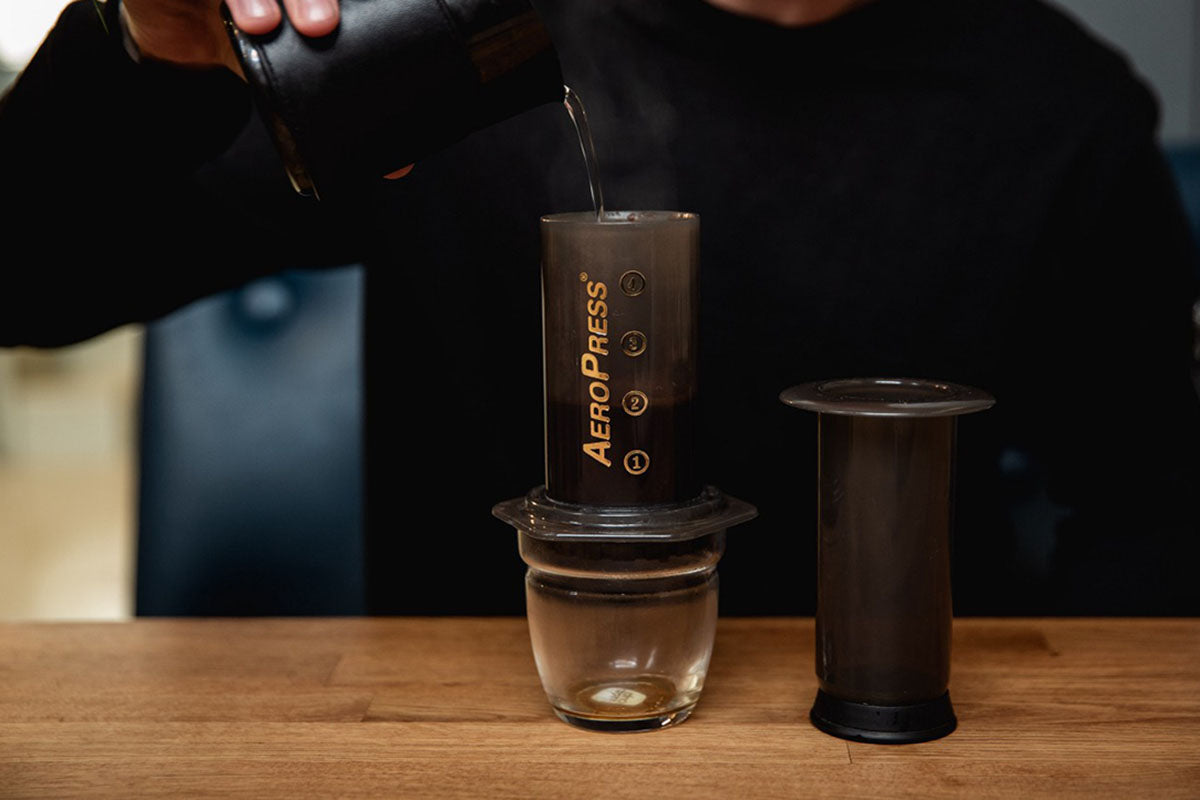
Step 4
Then pour in your boiling water right to the top. Use filtered water if you can. Then let the coffee steep for two minutes.
Why? Filtered water helps the real flavours come through. Most coffee shops and roasters have a filtered tap.
 |
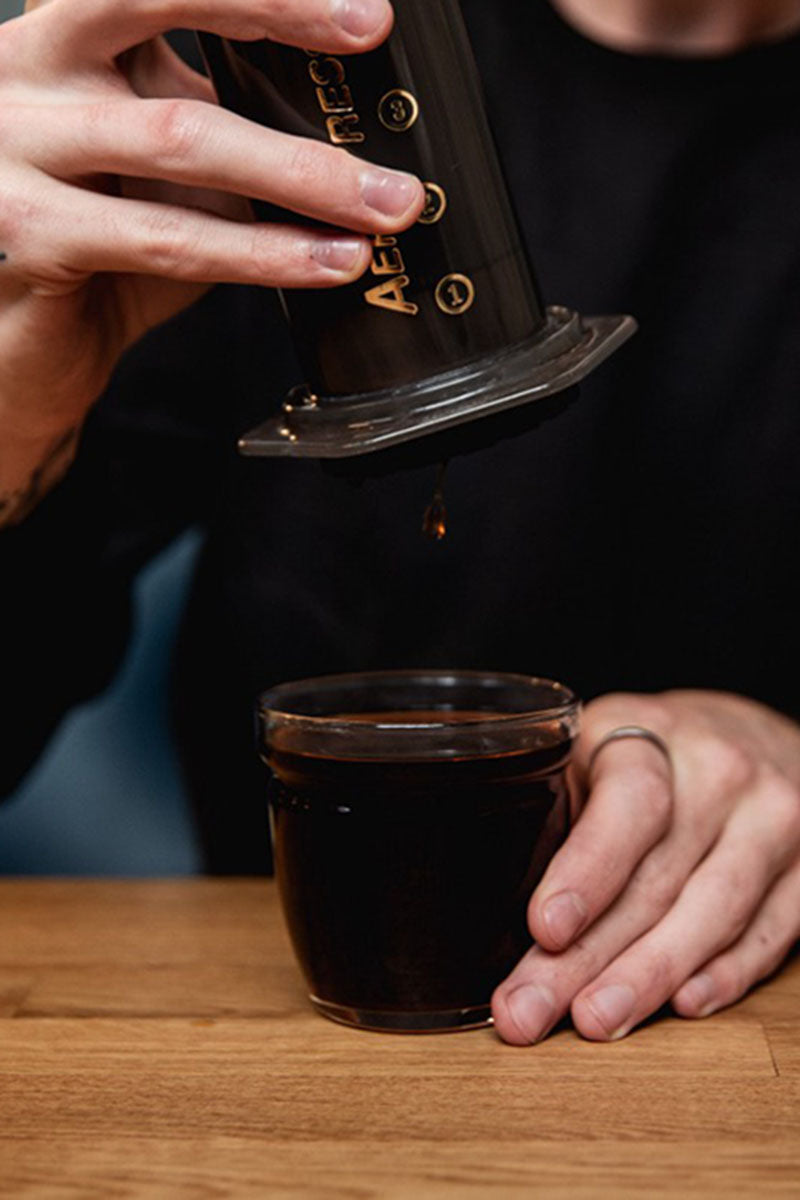 |
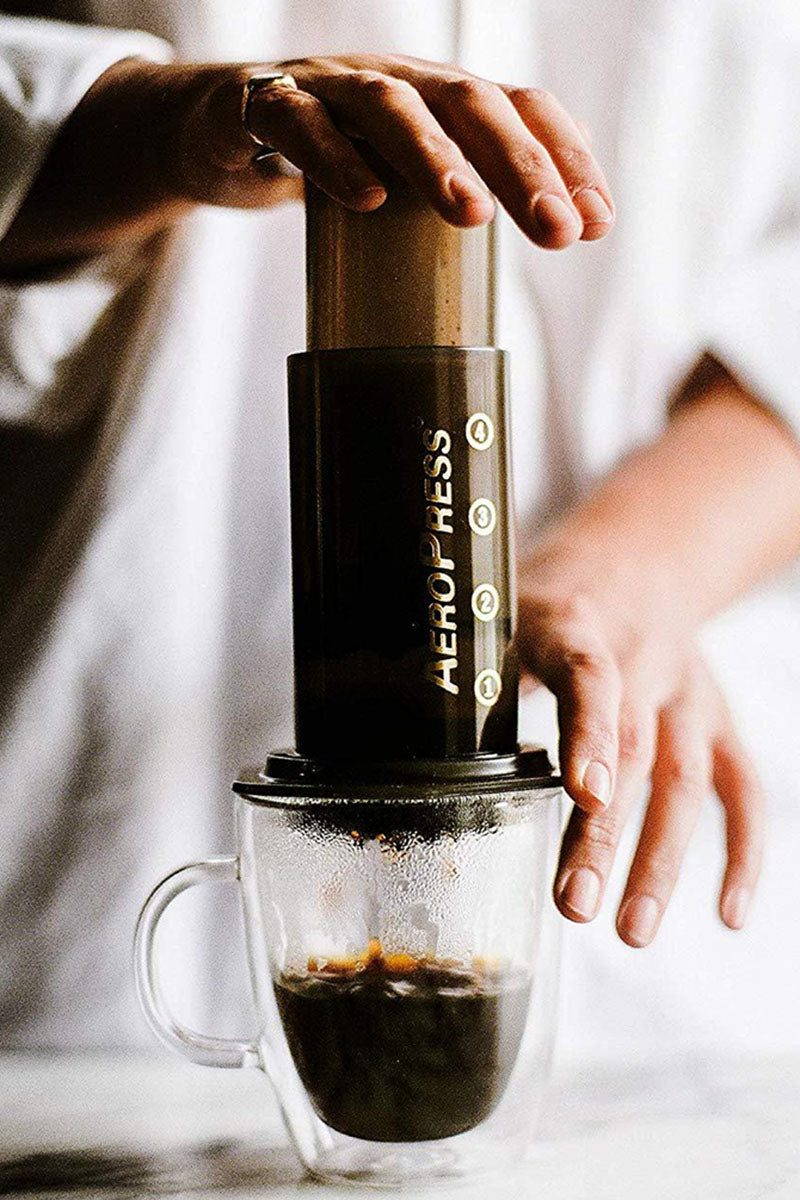
Step 5
Plunge into a cup and drink.
Perfect cold-brew: If you fancy a twist, then store in the fridge overnight. Tah-dah! Cold-brew coffee — delicious, and trendy enough to boast about.
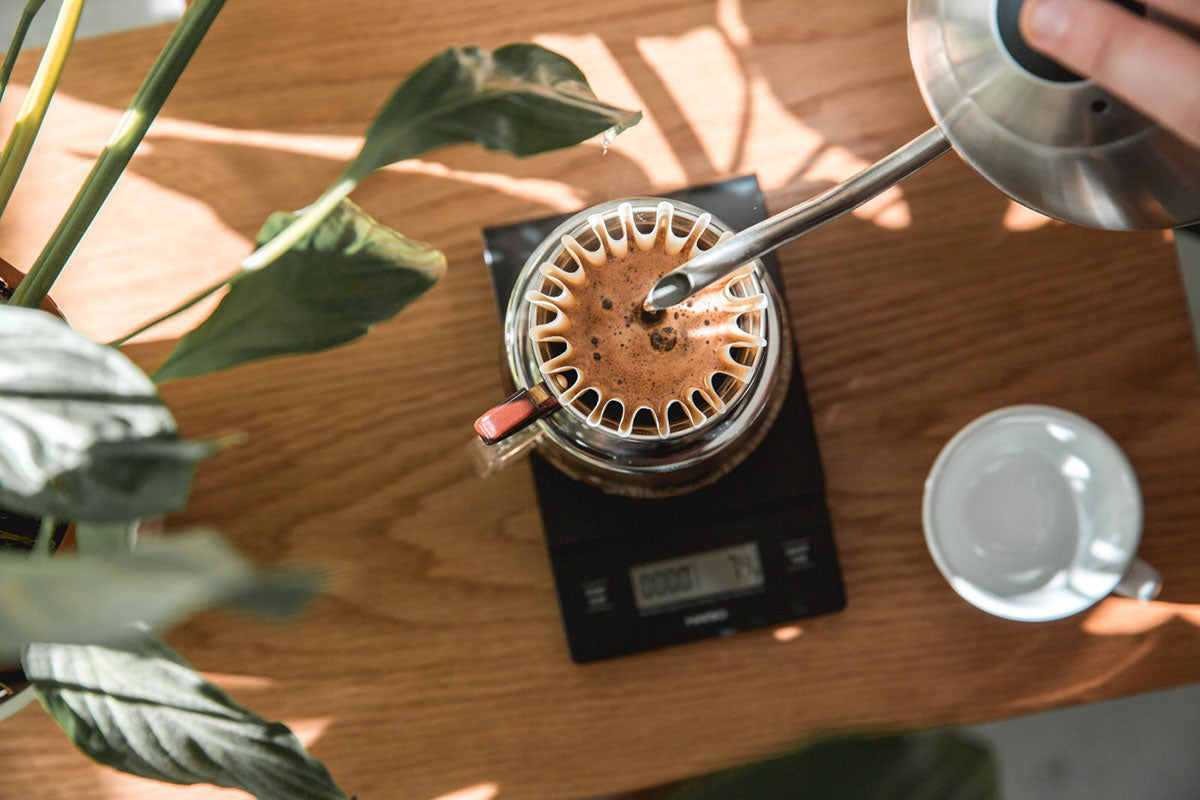
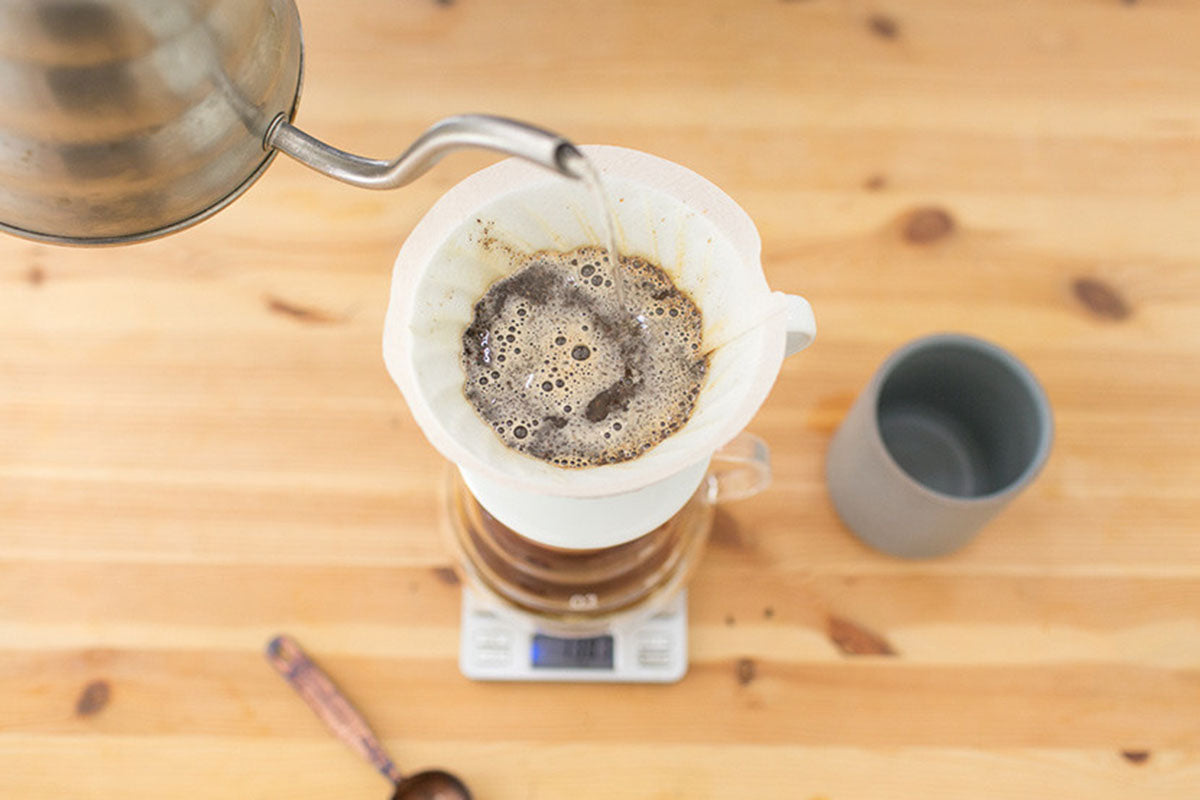
The Pour Over
Also known as a V60, the number is a reference to the angle of the cone. This is an easy way to make single filter coffee without a machine. The flavour is mellow and you don't end up with any bits, and is great if you prefer a big cup of coffee.
You can buy the hardware from Volcano Coffee, here.
You'll need:
25g of coffee
400ml of boiling water
Paper filter
Filter Cone, Hario V60
Step 1
Place the filter paper into the cone. Rinse with boiling water. This will also pre-heat your server. Then discard the water from the server or pour into your cup to warm.
Step 2
Add 25g of fresh coffee into the cone and pour over about 50–80ml of water. Ideally using a pourer with long spout.
Why? “The way you pour is very important; you can’t do this with a normal kettle”, says Kurt Stewart, founder of Volcano Coffee. He explains that pouring a large amount of water quickly over the grounds can cause “dry patches in the coffee, and it won’t filter properly. Begin in the centre and work the water out to the edges in a circular motion.”
Step 3
Wait for the coffee to bloom.
What is it? The bloom is the part of the coffee brewing process in which the gasses from the coffee are released as the water hits the grinds. It causes the grinds to grow and rise. The CO2 that is inside the bean is purged out and replaced with the water and begins the brewing/extraction process.
Step 4
Slowly pour in more water. Pour in circles to evenly coat the coffee until you are 2cm from the top. Then wait for the coffee to drip through.
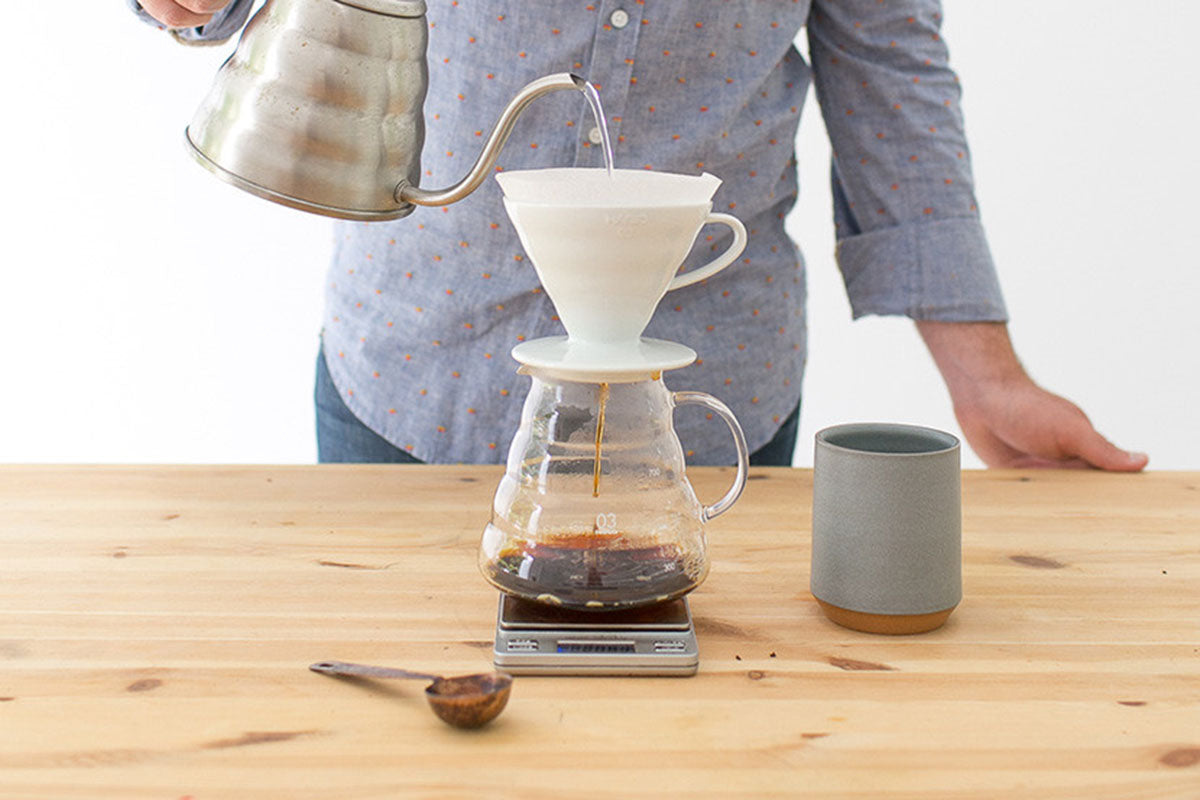
Step 5
Before all the water has dripped though, pour in the rest of your water and let it drip through.
Step 6
Pour the coffee into your cup.
The stove top method
What you need:
Moka pot
Medium ground coffee
Cold water
Hob - electric or gas
Step 1
Fill the base with cold water (recommended by Allpress Coffee), filtered if possible. Fill to just below the the pressure valve inside the base.
Step 2
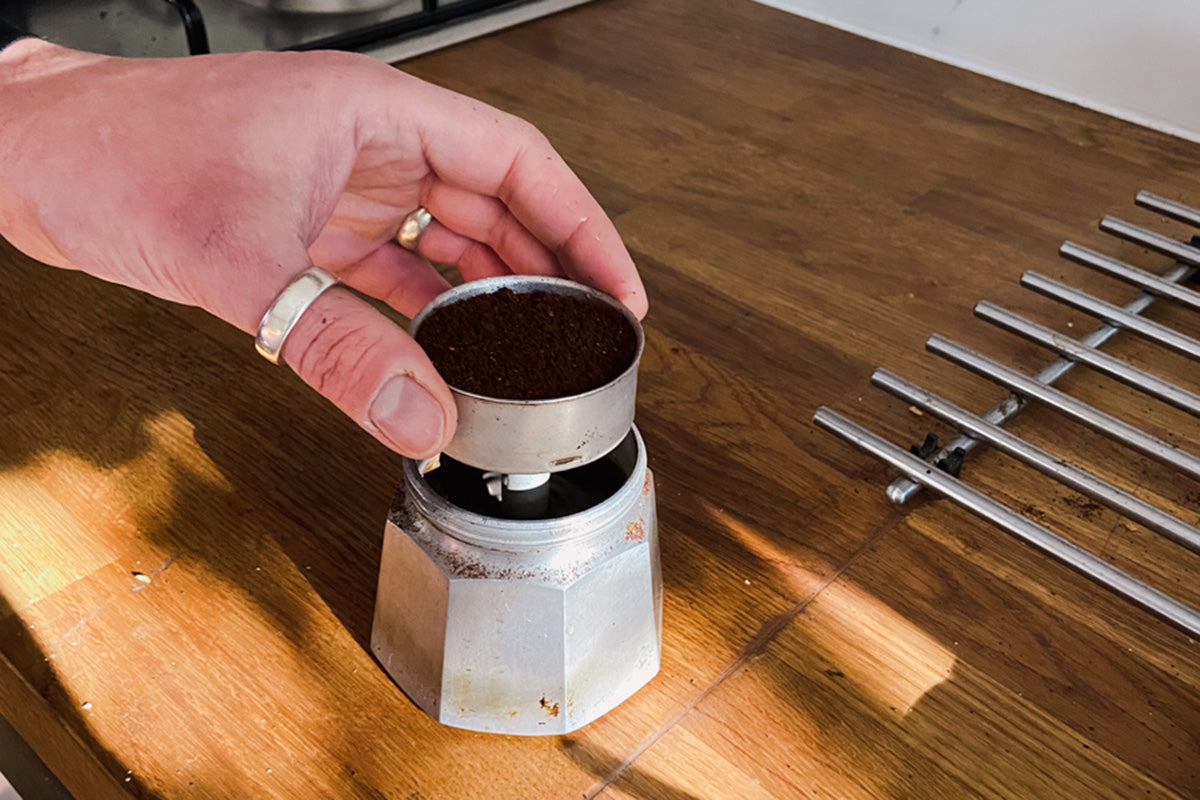
Fill the coffee basket with freshly fine-ground coffee. There is no need to tamp the coffee into the basket, just tap with your fingers.
Step 3
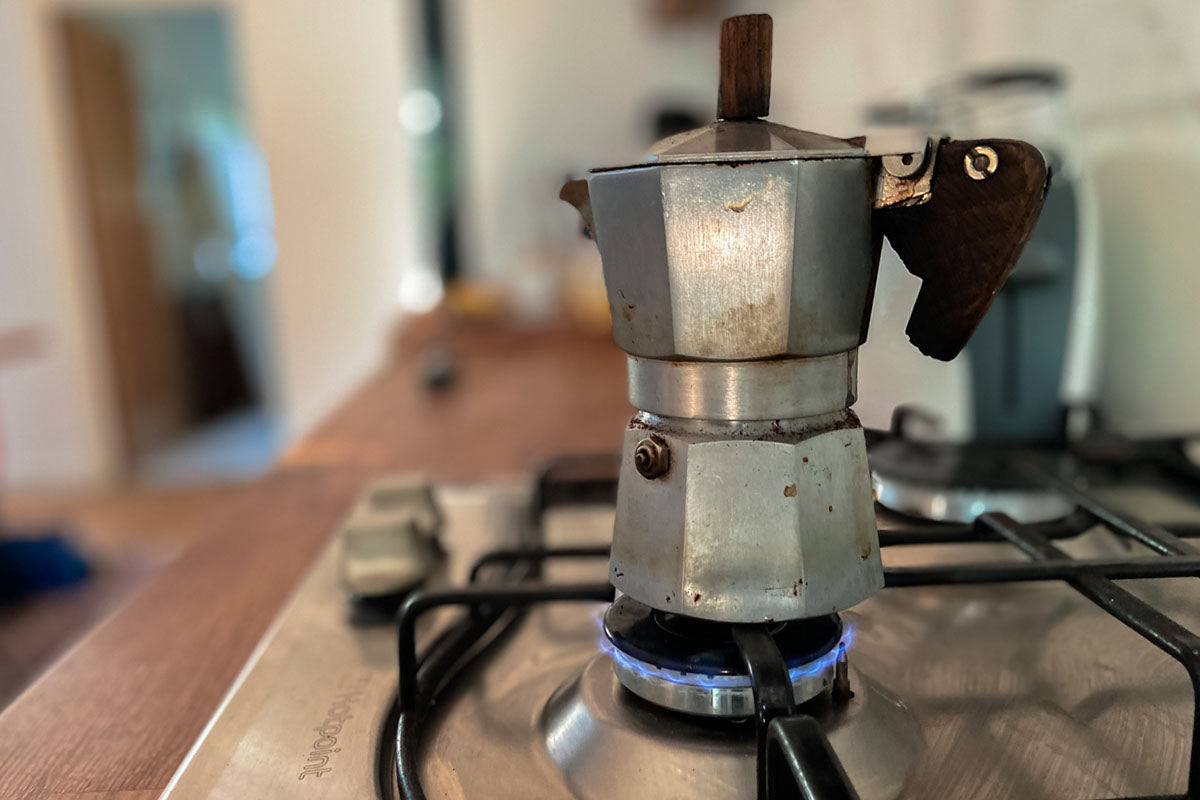
Place the basket into the base. Screw the top section together and place onto your heat source.
Tip: If you're using gas, don't let the flame lick wider than the base.
While you are waiting, warm your cup either for 20 seconds in the microwave or with hot water.
 |
 |
Step 4
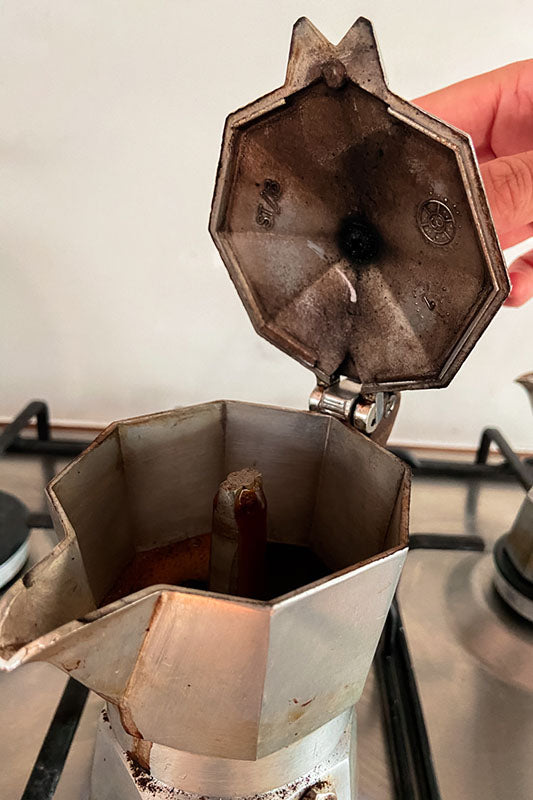
The coffee will begin to extract and fill up the top chamber. When you hear it start to splutter, remove it from the heat source.
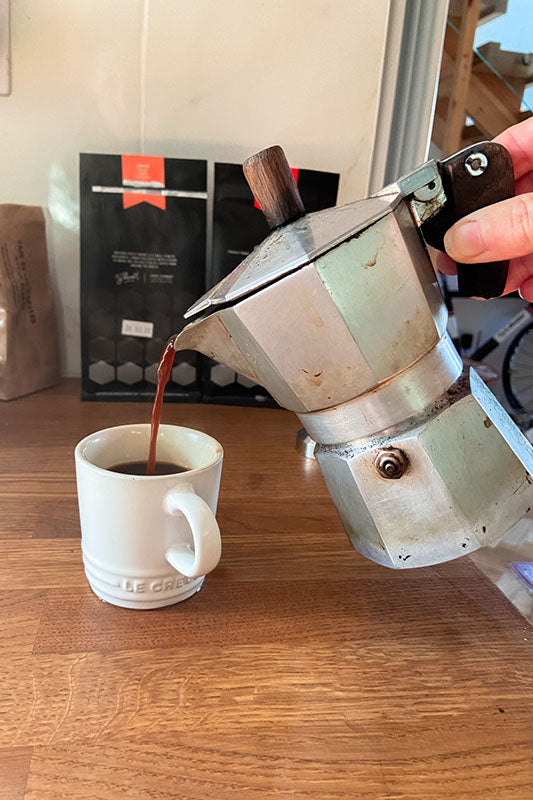
And pour.
Do you need a new tableware for your home cafe stop? Check out our Condor coffee sets available in large cups and small espresso sizes with a saucer.