Tubeless tyres are based on a similar system to a car tyre, whereby an open rubber tyre sits firmly in the wheel's rim and no inner tube is needed. For both road and off-road riders, the main advantage of tubeless is fewer flats. If the tyre is cut by glass, thorns or stones, the sealant inside the tyre instantly dries around the hole, preventing air from leaking out.
Tubeless tyres are often supplied on mid- and high-end mountain bikes and gravel bikes, and there are an increasing number of tubeless tyres available for gravel, road and mountain bikes from big name brands.
How, why, advantages and disadvantages
How do tubeless tyres work?
A tubeless tyre looks like a standard tube-type clincher tyre, but requires no inner tube and, once ‘seated’ (the process of snapping the beads into position), it forms an airtight seal with the rim. A valve, just like the one you’d find on an inner tube, is fitted directly to the rim. Sealant is poured into the tyre to create a seal and to help plug any tiny leaks or cuts, often before you even know you’ve got a puncture.
Advantages of tubeless tyres
Beat the flats
For both road and off-road riders, the main advantage of tubeless is fewer flats. If the tyre is cut by glass, thorns or stones, the sealant in the tyre instantly dries around the hole, preventing air from leaking out. This makes them perfect in poor weather conditions and winter where debris is frequently washed onto the road. The beauty of tubeless is that you won’t even know your tyre has been compromised during the ride on the majority of occasions. You're not left freezing at the side of the road, fixing punctures and getting your hands dirty.
Perfect for gravel and cyclo-cross riders
Off-road tubeless tyres can run at lower pressures (as low as 20–25 psi), providing better grip on loose surfaces without the risk of pinch or snakebite punctures. If you are planning on tackling rough cobbles or icy roads, road tyres can be run as low as 70 psi for extra grip and comfort without fear of the tyre detaching from the rim.
Better roll, better ride feel
A tubeless tyre rolls up to 12% faster than a clincher tyre. The lower rolling resistance and shape helps the tyre to sit better on the ground. This creates added compliance, ensuring you get a great quality ride from the tyre.
Wider Tyres
Tubeless provides a lower rolling resistance and therefore moving up to a wider tyre for better grip, comfort and control doesn’t come as a compromise compared to a traditional inner tube and clincher set up, which is why performance-focused cyclists have traditionally preferred 23mm or 25mm tyres as it requires less energy to maintain speed over a wider clincher tyre.
Disadvantages of tubeless tyres
Tubeless isn’t just a matter of removing the tube and riding blissfully into the sunset. Unfortunately, they do carry some compromises, including new knowledge and more maintenance than trusty tubes.
Firstly, sealant will dry out over time so you need to top up the sealant in your tyre every 3–6 months with a few millilitres of liquid. Tubeless tyres also need to be pumped up more frequently than tubed tyres.
It’s advisable to check your pressures before every ride. The initial set up of tubeless tyres can be more expensive than purchasing the equivalent clincher tube tyre, as you’ll need to buy valves, sealant, a floor pump and — depending on the wheel — tubeless ready rim tape.
Hookless rims, UST, tubeless-ready and tubeless compatible
There are a mixture of terms used by different manufacturers relating to tubeless tyres and the technology and that can be confusing when purchasing tyres for your wheels. We’ll explain the different tubeless options.
UST
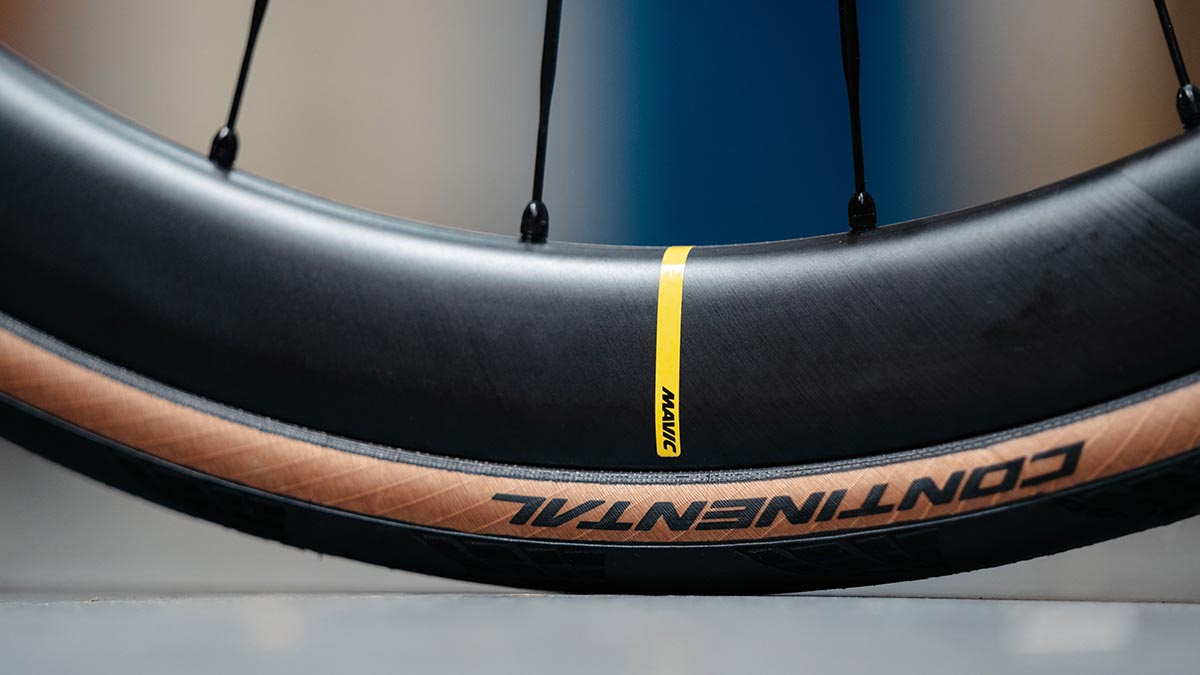
In the late nineties, Mavic created the UST standard (Universal System Tubeless), and this is only designed to work with UST-conforming tyres and rims. These tyres are made to an exacting specification and are more airtight than many ‘tubeless-ready’-designated tyres.
Tubeless-ready
For some brands, a tubeless-ready rim is exactly that, and all you need to do is insert a valve (which may or may not be included with the wheels), fit an appropriate tyre, and add the required amount of sealant.
Tubeless-compatible
If a wheel is described as tubeless-compatible, it’s likely you’ll also need to fit tubeless tape to seal the rim. It is not uncommon for ‘off-the-peg’ bikes from brands to be supplied with tubeless-compatible wheels, but non-tubeless tyres.
That means you’ll need to purchase a set of new tyres, sealant and valves if you want to utilise the technology.
Hookless
Hookless rims are a newer technology. A hookless rim is simply one with a profile that lacks bead hooks with protruding edges that help retain conventional clincher tyres under pressure. A hookless rim has straight, vertical sides, and in wheel maker circles the technology is often referred to as “tubeless straight side” or TSS. Hookless rims are designed to be used with tubeless tyres only.
It is possible to fit a tube (e.g. in the event of a puncture that sealant won’t fix) but only in that same tyre. It’s not usually considered safe to swap to a standard clincher tyre. Continental stands out among tyre manufacturers by explicitly forbidding the use of hookless rims with its flagship road tyre, Grand Prix 5000 and created the Continental Grand Prix 5000 S TR for use with hookless.
Should I go tubeless?
For off-road riders, gravel and cyclocross bikes, switching to tubeless is a great idea. Trails and gravel surfaces have lots of material that is likely to slash your tyre. Tyres are run at lower pressures, especially on wetter or muddy rides and tubeless tyres will avoid pinch punctures as you hop or smash over roots, rocks and curbs.
For road riders who use their bikes in poor conditions and commuting, tubeless also makes good sense as there is often debris around. You may find yourself bumping up and down curbs as you move between the cycle path and the road, and pinch punctures can often occur.
For road bikes that are used almost exclusively in the spring and summer, tubeless tyres don’t hold as many advantages, though there are still the performance benefits of lower rolling resistance to consider.
How to set up tubeless tyres
Here's what you need
Tubeless tyres: only tubeless tyres can be fitted as they are design to fit into the rim and hold a airtight seal.
Tubeless compatible rims/wheels: check your wheels are compatible, they may have a sticker to indicate whether they are UST, Hookless or Tubeless Compatible.
Tubeless tape: Tubeless tape is an airtight rim tape that is applied to the bed of a rim to seal up spoke holes and rim joins. Some rims — mostly from Mavic — are built to UST (Universal System Tubeless) standards. This means your rim does not require tubeless tape.
Tubeless valves: A tubeless valve is a Presta-style valve that is identical in function to a regular inner tube valve.
Any good tubeless valve should have a removable core. This helps with initial inflation and seating and, should the valve core become clogged up with sealant, allows you to either clean or replace this easily without having to unseat the tyre.
Sealant: Sealant is a milky, most commonly latex-based liquid that will seal small holes in your tyre. The amount of sealant you require is dependent on your tyre, its size and storage. A road tyre requires between 40 and 60 ml of sealant.
The steps
1. Clean the rim and tyres
Remove your existing tyre. If you have standard rim tape or older tubeless rim tape that is worn, remove it and clean away any residue or old sealant. Do not use metal objects to scrape away glue, but rather a sealant cleaner or warm, soapy water. Don’t use solvents on carbon rims.

2. Apply tubeless rim tape
If your rim requires tubeless tape, start from opposite the valve hole and apply the tape in one continuous strip, working in small sections and sticking down as you move around the rim. Once you have worked around the wheel and reached the start of the tape, overlap by around 10 cm. If you rip, damage or snag the tape, it is best to start again to ensure you have an airtight seal.
3. Install the valves
Make the valve hole on the rim and pushing, from the inside outward, with a bradawl, small screwdriver or spoke to mark exactly where the valve hole is. Push the valve through the hole and let it ‘cut’ the hole to size. Push down on the valve with your thumb and screw on the lockring. It’s good practice to put the tiniest dab of grease on the lockring to make roadside removal easier.

4. Fit the tyre
Fitting a road tubeless tyre is exactly the same as a regular clincher, but can be a bit more difficult due to the tighter bead. Once you’ve got both sides of the tyre on, manipulate and massage the tyre and ensure it is sitting in the well all the way around the rim.
5. Add the sealant
Add the sealant via the valve. This can be done with a syringe or a small applicator bottle. The sealant can be added before fully fitting the tyre onto the rim.
We find that for new rim/tyre combinations or for riders going tubeless for the first time, adding sealant via the valve is slower but easier.
6. Inflate and seat
Rotate the wheel to coat the inside of the tyre. With the valve core still removed, double check that the tyre is seated correctly around the whole wheel.
Fit your track pump and, hopefully, a few swift blasts of air will pop the tyre into place. If only one side or a section of the tyre seats, keep pumping until you hear a few pings and the tyre is seated around the full circumference of the wheel.
7. Fit the valve core
Shake the wheel then spin it. Fit the valve core and inflate the tyre to full pressure.

Ongoing maintenance
Check your tyre pressures each week as tubeless tyres can lose pressure faster than clincher. Make a note or smart phone alert to check your sealant in 3–4 months.
Sealant can dry out so you will need to top it up. Give the wheel a shake and if you can hear the sealant sloshing around you need to add more liquid. Remove the valve core, and using the applicator add in a few milliletres. Pump up the tyre.
The ultimate tubeless tyres FAQ
How to repair chipped bicycle paint work

No matter how much care you take of your bike, you’ll inevitably put a chip in its shiny paintwork at some point. Don’t panic, with a small pot of model paint and our how-to guide, you can vanish away those unsightly scars.