Tools for home care
- Tyre pump: mini folding floor pump or full size floor pump
- Old cloth (use an old T-shirt, tea towel or towel)
- Allen key set
- Blunt knife or small Allen key for tyre debris removal
- Bicycle chain oil: all condition or wet weather
- GT85 or similar water displacer 15mm spanner (and possibly a 10mm spanner, if you have an older Brompton model)
Regular checks
If you ride your Brompton 3–4 times per week, we recommend checking your bike monthly. If you ride your Brompton up to 1–2 times a week, we recommend checking your bike every 6–8 weeks.
- Reinflate your tyres. Brompton tyres should be inflated to around 90 PSI. You can check the sidewall for minimum and maximum pressures.
- Use a cloth to wipe your rims and brake pads.
- Check the brake pads for wear.
- Check the seat sleeve for wear: If your seatpost is slipping when riding, you can tighten the seat clamp bolt. This cannot be done indefinitely. If four or more threads show on the bolt, it's time to get the sleeve replaced.
- Wipe, clean, and re-oil the chain (guide below).
6 monthly checks
- Check the rear hinge: Unclip the rear frame and try to twist the rear frame and main frame. You should not feel any play in the frame.
- Check the main hinge for play: unscrew the clamp and push the tubes up and down in the opposite direction to each other.
- If you ride in wet weather or live near sea or sand, spray a harsh conditions frame protector inside the frame. We recommend Muc-Off HCB-1 Harsh Condition Barrier Spray.

After riding in wet weather
- Don't store the bike in a cold shed or garage.
- Keep the bike unfolded until surface water has evaporated.
- Use an old cloth to wipe off water from the frame, around the hinges, lightly wipe the chain, wheels, seatpost and clamp.
- Keep the seatpost extended overnight to allow water to dry.
- If you have time, spray GT85 or a similar water displacer into the bottom bracket area, bolts around the brake caliper, and hinges.

How to quick clean your chain
If you perform this quick clean regularly, you'll significantly prevent the build-up of thick, stubborn grime, making future cleans much easier with less need for a deep clean with degreasing solution, or a new chain.
Spray GT85 onto a cloth: Spray a section of the cloth generously with GT85 or any other water displacer spray like WD-40 (although GT85 is often preferred for bikes as it leaves less residue).
Clean the chain:
- Classic Method: Hold the sprayed cloth firmly around a section of the chain. While keeping a good grip, rub the cloth back and forth along the chain, applying moderate pressure.
- Move to a new section of the chain and repeat until you've covered the entire length.
Pedaling Method:
- This method is easier if you can raise your bike off the floor in a workstand.
- Position the sprayed cloth around the bottom run of the chain. Slowly pedal the bicycle backward, allowing the chain to run through the cloth.
- Maintain a firm grip on the cloth, letting it collect the dirt and old lubricant.

Address the rear derailleur or chain tension (if applicable):
- If you have a 4-, 6- or 12-speed Brompton, or any Brompton with a rear derailleur, grime can often accumulate around the jockey wheels.
- Use a clean, unsprayed section of your cloth (or a separate, clean cloth) to carefully wipe off any visible thick grime from the jockey wheels. This helps ensure smooth shifting.
Re-oil the chain:
- Drip a thin, consistent line of oil across the top of each chain link.
- Aim to get the oil into the rollers and pins of the chain, not on the outside plates.
- Slowly rotate the pedals. This action will help work the oil into all the intricate parts of the chain links, ensuring proper lubrication.

Tip: you don't need to individually oil each link, rotating the chain will ensure it spreads across the links. Remove excess oil Take a fresh, clean cloth and gently wipe the entire chain.
Why this is important: Excess oil on the outside of the chain will attract dirt and grit, leading to a thick, abrasive grime build-up much faster. Removing the excess ensures the lubrication is where it's needed (inside the links) and not creating a magnet for dirt.
Additional Tips for a Quick Chain Clean:
Gloves: We recommend wearing gloves to keep your hands clean. Gloves can be anything from an old pair of gardening gloves to latex. You can spray the gloves with GT85 to remove any grime and use again next month.
Protect your floor: Place an old newspaper or cardboard underneath your Brompton to catch any drips from the spray or oil.
Listen to your chain: A clean, well-lubricated chain will run quietly. If you hear squeaking or grinding, it's a sign it needs attention.
Deep clean (less frequent): This method is for a quick clean. Periodically (e.g., every few months, depending on use), you might want to consider a more thorough deep clean using a dedicated chain cleaning tool and degreaser solution. You may also want to wash your frame with bike wash and spray when performing a deep chain clean.
How to remove rear Brompton wheel
Before you begin, make sure your Brompton is stable and won't fall over. Ideally, lift the rear wheel from the floor by hooking it on the back of a chair, using a hook or rail or use a bicycle workstand.
You will need:
- 15mm spanner
- A small tub to keep the components together c
loth or rag - Pliers (maybe)
- Shift into the highest gear:
- Shift the hub gear into the highest gear of the hub. This will slacken the hub gear cable.

Release the hub gear indicator chain:
- Rotate the knurled screw on the indicator chain.
- You may need to use pliers to rotate the screw if you cannot loosen by hand.
- There is a small washer that sits on the knurled nut, it can slip off if you release the chain too quickly.
- Unscrew the gear indicator chain from the hub, rotate the rod anti-clockwise and slice out from the centre of the wheel.

Remove the chain tensioner:
- Bromptons have a chain tensioner to keep the chain taut when folded. This needs to be released.
- Using the 15mm spanner unscrew the indicator nut, this will allow you to remove the tensioner.
- Push the tensioner arm upwards and hold it firmly under tension.
- Lift it away from the chain.
- You will need a firm hand to release the tensioner. With the tensioner released, the chain will be slack and you can remove the wheel.
Deflate tyre and remove wheel nuts:
- Deflate the tyre so that the wheel can squeeze past the brake calipers.
- Remove the plastic wheel nut caps and store them safely.
- Use a 15mm spanner to loosen the wheel nuts.
- Using one hand, gently pull the wheel backwards and downwards out of the frame dropouts.
 |
 |
 |
Reassemble:
- When you put the wheel back in, reverse these steps.
- You will need to push the chain tensioner into position. Rotate the lower arm anti-clockwise into the 2 o clock position.
- Holding it in position hook the chain between the two arms and push the tensioner onto the wheel axle (see our image).
- Gentle release your hands from the tensioner and it will hold its position on the chain.
- You can now reattach the indicator nut.
- Make sure the axle nuts are tightened securely.
- Reattach the gear cable correctly by threading it through and turning the rod clockwise to tighten (further details below on adjusting the gearing).
- Ensure the chain tensioner is functioning properly.
Additional Tips
Take photos: It's a good idea to take photos of the gear cable attachment and the chain tensioner setup before you start. This will help you reassemble everything correctly.
Check gear shifting: After reattaching the gear cable, test that the hub gears shift smoothly through all the gears. If they don't, you may need to adjust the cable tension. See our guide below.
Check wheel alignment: Make sure the wheel is centered in the frame.
Don't force anything: If something feels difficult, double-check that you've released the chain tensioner and disconnected the gear cable properly. Have a tub or container to keep your parts safe.
How to adjust Brompton hub gears
Brompton 3, 6 and 12 speed and older Brompton 5-speed folding bicycles use hub gears.
Overtime the cable will naturally stretch and you may need to adjust the gears. If you remove the rear wheel you may need to adjust your gears.
When to Adjust Your Hub Gear:
You'll know it's time to adjust your hub gear if you experience any of the following:
- Skipping or Slipping Gears: The chain might skip, or the gear might feel like it's trying to shift but not quite engaging properly.
- Difficulty Shifting: It feels unusually stiff or hesitant to shift into a particular gear.
- Inaccurate Shifting: The gear doesn't engage properly even when the shifter is in the correct position. For example, you shift to gear 2, but it still feels like gear 1 or 3.
- Noisy Shifting: Excessive clunking or grinding during shifts.
How to Adjust (The Indicator Chain Method):
Brompton hub gears have a very clever and easy way to check adjustment: the indicator chain.
Shift to Gear 2:
- This is the crucial gear for adjustment.
Locate the Indicator Chain:
- Look at the rear wheel hub. There's a small rod (the "indicator chain") that protrudes from the center of the hub where the gear cable connects.

Check the Alignment:
- On the end of the indicator chain, there's a small shoulder or a nut.
- There's also a "guide" or an axle nut with a small hole in it, through which the indicator chain passes.
- The goal is to align indicator chain so that through the guide hole you can see 2mm of the shoulder/rod
- If the shoulder/rod is inside the guide, the cable is too tight.
- If the shoulder/rod is outside the guide, the cable is too loose.
- If 2mm of the rod is showing, the adjustment is correct.
Adjust the indicator chain:
- Loosen the Lock Nut:
- Turn clockwise: To pull the indicator chain further out (this effectively loosens the cable tension).Turn anti-clockwise: To push the indicator chain further in (this effectively tightens the cable tension).
- Align the Shoulder/Nut: Turn the adjusting barrel until the shoulder/nut on the indicator chain is perfectly flush with the end of the guide/axle nut. Take your time and get it as precise as possible.
- Tighten the Lock Nut: Once the alignment is correct, hold the adjusting barrel (to prevent it from moving) and tighten the 10mm lock nut (clockwise) with your fingers. Don't overtighten, but make it snug.
Replacing Brompton Brake Pads
Replacing the brake pads of a Brompton bicycle is a quick and simple task. You will need to remove the wheel to change the pads and we've provided guide to removing the rear wheel. Below we have noted how to remove the front wheel.
Check your brake pad for wear, there is a limit line on the brake pads.

Part 1: Fitting new brake pads
Loosen the axle nuts:
- Remove the plastic axle nut covers from either side of the front wheel.
- Using your 15mm spanner, turn both nuts counter-clockwise to loosen them.
- You don't need to remove the nuts completely. Some people loosen the drive side (right side) nut about halfway, and then fully remove the non-drive side (left side) nut, especially if it's integrated with a mudguard stay.
Note the washer orientation:
- As you loosen the nuts, pay close attention to the washers on each side of the axle. There's a tabbed washer (sometimes called a "security washer" or "anti-rotation washer") that engages with a slot in the fork dropout.
- Put the washer and the nuts in a dish or tub to keep them safe
Deflate the tyre:
- You will only need to deflate the tyre partially to push it past the brake caliper
- Gently push the wheel downwards and out of the fork dropouts. You might need to wiggle it a bit to clear the brake pads and fork.

Remove the old brake pads:
- You do not need to remove the complete brake holder.
- Locate the small retaining screw or pin at one end of the brake shoe.
- Using a 2mm Allen key, loosen and remove this retaining screw/pin. Keep it safe!
- Slide out of the brake shoe holder. It might be stiff from dirt and wear. A gentle wiggle or a slight pry with a small flat-head screwdriver can help.

Fit the new brake pad
- You may want to wipe the new brake shoe and remove grime, brake dust and dirt.
- New pads often have directional arrows or markings for "Left" (L) and "Right" (R) or indicate the direction of wheel rotation.
- Carefully slide the new brake pad into the slot on the brake shoe holder.
- Tighten up the small screw to hold the pad in place.
Refit the front wheel
- Reverse the steps of removing the wheel
- Remember that one side of the wheel has a specific washer for the mudguard.
- Tighten the wheel nut with 15mm spanner.
Part 2: Adjust the brakes

Locate the Barrel Adjuster:
- The main brake barrel adjuster is usually located where the cable enters the brake lever on the handlebar.
Test Brake Lever Free Play:
- Squeeze your brake lever. There should be a small amount of "free play" (movement before the pads touch the rim) but not too much.
- The lever shouldn't touch the handlebar when fully squeezed with reasonable force.
- The brake pads should be close to the rim but not rubbing.
Adjust Tension:
- If you do not need to fit new brake pads, as there is plenty of material, you can change the brake cable tension.
- To increase tension (make brakes tighter/less free play): Turn the barrel adjuster counter-clockwise (unscrew it from the lever or caliper body). This pulls more cable through, bringing the pads closer to the rim.
- If you have fitted new brake pads, adjust the barrel adjust back into the standard position after fitting the pads to reset the tension.
Top products for caring for your Brompton

GT85 Bike Cleaner and Spray Lubricant


GT85 Bike Cleaner and Spray Lubricant
A long-standing favourite with professional and amateur bike mechanics alike GT85 Spray Lubricant 400ml is a general-purpose cleaning/lubricating spray fortified with PTFE.
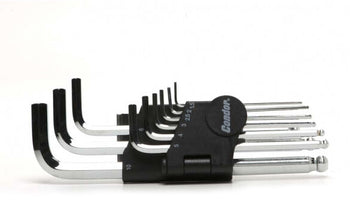
Condor Allen Key Set


Condor Allen Key Set
Tired of searching the bottom of your tool box for the right allen key? The Condor Allen Key Set features a plastic holder, and the long handle provide great leverage.
 Sale
Sale
Muc-Off HCB-1 Harsh Condition Barrier


Muc-Off HCB-1 Harsh Condition Barrier
Keep your precious steed in tip-top condition with the Muc-Off Harsh Condition Barrier.
 Best Seller
Fenwick's All Conditions Chain Lube


Fenwick's All Conditions Chain Lube
Our readily biodegradable chain lube is designed for everyday use.