Knowing how to set up your cleats will help you to get the most out of your SPD or other clipless pedals.
There are two basic things to sort out when it comes to setting up your cleats: the angle of the cleat on the sole of your shoe, and its fore-aft position.
It is generally accepted that positioning the cleats so that the centre of the pedal axle will be in line with the ball of your foot is biomechanically the optimum for pedalling efficiency and power transfer.
Follow these simple steps for easy cleat set up
1. In your normal cycling socks, sit down.
2. Feel, by pressing with your thumb or finger, along the inside edge of the foot to locate the ball of your foot. This should be fairly easy to locate, as it is the bony knuckle protruding sideways at the bottom of your big toe.

3. Put your shoes on. Find that same bony protrusion point. Mark the side of the shoe at the centre point of the ball as accurately as possible. Then do the same for the other foot.
4.Transfer the line straight down to the same point on the sole. Make sure your mark is visible on the sole.
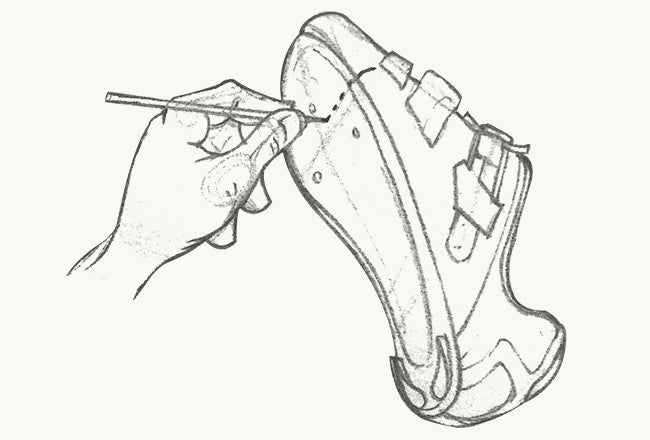
5. Fit cleat, loosely, aligning your mark with the point on the cleat where the centre of the pedal axle will be once you are clipped in. Most cleats provide a marker on the side, by way of a notch or line to indicate the centre of the pedal axle, so it is just a case of lining up your mark with theirs.

Cleats: fore and aft
Move the cleat side-to-side to influence how close the foot sits to the centre-line of the bike. If you ride with your knees wide at the top of the pedal stroke, move your cleats inwards to move the foot outwards. If you ride with knees narrow at the top of the stroke, move the cleats towards the outside of the shoe and the foot inwards.
If you walk with your toe outwards (duck footed) rotate the cleats outwards, if you walk slightly inward (pigeon toed) rotate the cleat inward. Make minor changes in small increments. Scuffing of the shoes, cranks or chainstay will highlight if you need more rotation.
Tension and float - what is it?
Tension is simply how easy it is to get in and out of your pedals. Most have some form of adjuster screw that allows the user to decide how tightly clipped in they want to be. Initially we'd advise going for the lightest setting but it's worth bearing in mind that once it becomes second nature to clip in and out, more tension will be just as easy to use, and much more secure, too.
Most pedals and cleats have a degree of float to allow your feet to pivot slightly as you pedal. Float is measured in degrees and is the amount by which the foot can move before releasing from the pedal. Some cleats are zero-float, or fixed, which, as you can imagine, keeps your feet 'locked in' to the pedal with no movement. Other cleats are in the six-degree range, which most riders use, allows for the knees to move a little during the pedal stroke.
If you are unsure or have a previous injury we recommend you visit us in-store or book a cleat assessment.